Fire and Life Safety – Getting a Certificate of Occupancy, Part 1: The Process

Obtaining a Certificate of Occupancy for Fire and Life safety – one of several certificates of occupancy required for new buildings – is a complex process designed to ensure suitable systems are in place to save lives. Whether you’re a general contractor or property manager, navigating the process is easier when you know what to anticipate. This two-part series offers an overview of the process and tips to avoid delays and earn a certificate of occupancy for fire and life safety.


Fire and Life Safety Certificate of Occupancy: What to Expect

The fire alarm installation and monitoring company, or technology integrator, is ultimately responsible for bringing the fire alarm system to code. They typically work under the electrical contractor, who works under the general contractor.

Reputable fire alarm installers adhere to the following process and best practices.


The Installer Pulls Two Types of Permits

The fire alarm installer requests two types of permits, a fire alarm permit, and an electrical permit.

The city Authority Having Jurisdiction (AHJ) issues the fire alarm permit. Typically, the installer works with the AHJ during the design phase to ensure the system meets state and local requirements.

Depending on the jurisdiction, the local AHJ or a state inspector issues the electrical permit. It’s the same inspection either way, and local staffing limitations may play a role in that decision.


The Installer Installs Cabling and Back Boxes Before the Rough-in Inspection

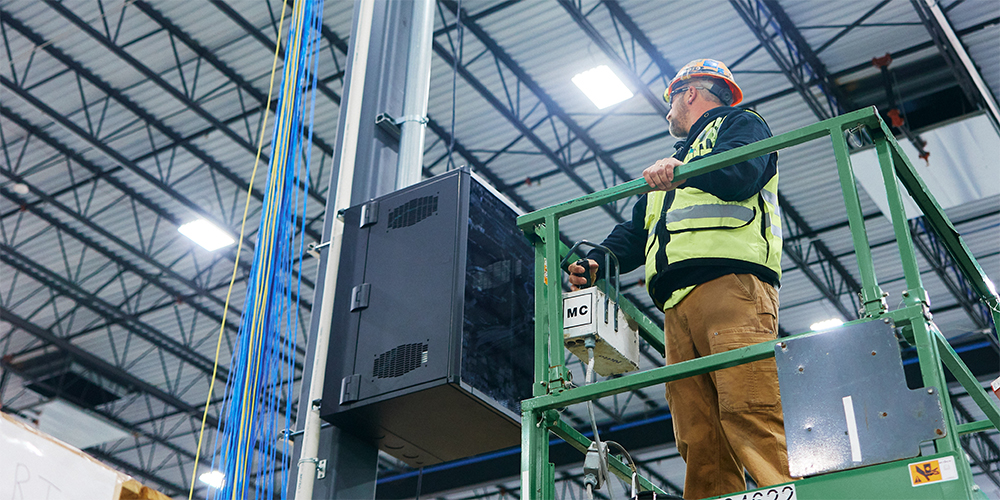
Once the installer obtains fire alarm and electrical permits, they’ll install cabling and back boxes for fire alarm devices throughout the building. Cabling must meet standards outlined in the National Electric Code (NEC), Article 760.

Next, the electrical inspector completes a rough-in inspection while the cabling is still visible. Once approved, general contractors begin finishing work such as drywalling, painting, and wallpapering.


Field Device Terminations Begin

After the general contractor has finished the walls, the fire alarm installation company:

  • Installs smoke detectors, control panels, strobes, and other safety devices
  • Programs and tests circuit integrity for each device
  • Tests control panel terminations and circuiting to ensure there are no ground faults, missing devices, or panel issues

Once installation and programming are complete, the panel will report “System Normal.”

The fire alarm contractor also creates as-built drawings – blueprints that include device locations, cable routes, and device and circuit addresses. If the control panel reports an issue, the as-built drawings will indicate where to find it.


The Installer Coordinates Testing With Elevator and Sprinkler Contractors

The fire alarm contractor doesn’t install elevator and sprinkler systems, but they coordinate with those contractors and guide necessary integration with the fire alarm system to make sure all systems function correctly in the case of a fire event.

For fire department access, the fire alarm system must communicate a fire event to elevator machinery, sending it to a designated floor – also known as an ultimate recall location. If the fire blocks access to that floor, elevator cars go to an alternate floor. Firefighters can also use a fire service key to override elevator programming. Contractors test these features alongside a state elevator inspector.

The installer also ensures every water flow device communicates with the fire alarm panel and central monitoring station. They test tamper switches and on/off valves, plus monitor valves to ensure they’re not closed if there is a fire event.


Post-installation Pre-testing

After device installation, the fire alarm installer pre-tests the system to make sure it will:

  • Communicate a fire condition to a central monitoring station
  • Notify tenants and occupants

The pre-test includes checking every installed fire alarm device to ensure proper function, including audio and visual communication.


Final Testing and Permitting

Once the fire alarm installer confirms the system works as intended, they’ll test it with the AHJ – usually within two to three days. Typically, the fire alarm, sprinkler, and mechanical contractors will be present.

The fire inspector approves the system and signs both the permit and a record of completion. The fire alarm installer and a building representative also sign the record of completion. The representative is often the general contractor, but it could be the building manager or owner. At this point, the fire and life safety certificate of occupancy is issued.

With the certificate of occupancy secured, the fire alarm installer places a document enclosure at every fire alarm panel. The documentation includes records of completion, as-built drawings, owner and operator manuals, and a copy of the fire alarm system program (often on a flash drive).

Finally, the installer trains the user to operate the fire alarm panel.


Next Steps

Now that you understand the certificate of occupancy process, find tips for streamlining the process in Part 2 of this article.

What is a SMART Board?

A SMART Board is an interactive whiteboard that allows users to interact with digital content. Unlike typical whiteboards, SMART Boards are touch-sensitive devices that allow users to write on them with the touch of a finger or a special stylus. Users can also move text or graphic elements around on the board.

SMART Boards are commonly used in classrooms and business conference rooms to engage students or employees and improve productivity.

In this blog post, we will discuss the different types of SMART Boards available on the market and how businesses and education use them to improve workflow.

What are SMART Boards used for?

In general, a smartboard is a great way to engage people of all ages in learning or productive tasks. Classrooms and businesses are the most common places to find smartboards. However, they can also be used in other settings, such as hospitals and museums.

What types of SMART Boards are available?

There are three main types of SMART Boards available on the market:

Interactive whiteboards: These boards are designed for use in classrooms and businesses. They allow users to interact with digital content, such as PowerPoint presentations or video files.

Portable whiteboards: These boards are smaller and easily moved from one location to another. They are often used in hospitals and museums.

Interactive projectors: This type of device can be used with any projector screen. They allow users to interact with digital content, such as PowerPoint presentations or video files.

What technology do SMART Boards use?

The SMART Board connects to a PC over an HDMI connection. The SMART Board displays what’s on the computer, and you can check what’s on the board as well.

The ability to work on a problem simultaneously on a SMART Board has been possible in more advanced versions for some time. Only one person could touch the board in early models because smart boards wouldn’t work with multiple touch sources.

There are two main types of SMART Board display technologies: those that use an LCD display and those that use a projector.

LCD SMART Boards are typically more expensive than their projector counterparts, but they offer several advantages. For one, LCDs do not require a dark room to function correctly, making them ideal for classrooms and offices with large windows.

Additionally, LCD SMART Boards typically have a higher resolution than projector-based models, making them better suited for displaying high-quality images and videos.

Projector-based SMART Boards are less expensive than LCD models, but they do have some drawbacks. For example, projector-based smartboards require a dark room to work, which can be disruptive to a busy workplace or classroom. Additionally, projector-based models typically have a lower resolution than LCD smartboards, making them less ideal for displaying high-quality images and videos.


What can you do on a SMART board?

There are many things you can do on a SMART Board. Here are some examples:

  • Display presentations
  • Show videos
  • Browse websites
  • Brainstorm ideas
  • Create collaborative documents
  • Annotate digital content

Many SMART Boards come with built-in software that allows you to annotate digital content, which enables you to highlight important points or draw attention to specific areas of a presentation.


How can SMART Boards be used to improve your workflow?

SMART Boards can be used in many ways to improve your workflow. For example, you can use a SMART Board to:

Create and Edit Documents: You can use a SMART Board to create or edit documents with your team, such as PowerPoint presentations or Word files.

Annotate Documents: You can use a SMART Board to annotate documents, such as PDFs or images.

Share Files: You can use a SMART Board to share files with others, such as PowerPoint presentations or video files.

Control Software: You can use a SMART Board to control software, such as Keynote or Adobe Photoshop.

No matter which type of SMART Board you choose, you’ll be sure to enjoy the enhanced collaboration and improved workflow they provide.

FAQs

Q: What is a SMART Board?

A: A SMART Board, also known as an interactive whiteboard, is a touch-sensitive display panel that enables users to interact with digital content using a stylus or fingers. It allows for interactive teaching, presenting, and collaborating by turning any surface into a digital workspace.

Q: How does a SMART Board work?

A: A SMART Board uses a combination of touch and gesture recognition technology to detect input from the user. It typically connects to a computer or other devices through USB or wireless connectivity. The board’s surface is touch-sensitive, allowing users to write, draw, and interact with digital content projected onto it.

Q: What are the benefits of using a SMART Board?

A: Using a SMART Board offers several benefits. It enhances engagement and interactivity in educational and business settings, making learning and presentations more dynamic. SMART Boards encourage collaboration, allowing multiple users to interact simultaneously. They also provide access to a wide range of educational resources and multimedia content, fostering a more interactive and immersive learning experience.

Q: Can I use a SMART Board with my existing devices and software?

A: SMART Boards are designed to be compatible with various devices and software. They can connect to computers, laptops, tablets, and smartphones, enabling seamless integration with existing technology infrastructure. SMART Board software often supports popular file formats and applications, allowing users to display, manipulate, and annotate content from different sources.

Q: Are SMART Boards suitable for all educational and business environments?

A: Yes, SMART Boards are versatile and adaptable to various environments. They are widely used in classrooms, boardrooms, training facilities, and conference rooms. Whether you’re an educator looking to enhance classroom interactivity or a business professional aiming to deliver impactful presentations, a SMART Board can create engaging and collaborative experiences.